Creating a Realtime PWA Using Angular and Firebase (Part 2)
In part one of this tutorial, we saw how we could create an application using Angular, Firebase and Cloudinary. In part two, we'll take a look at how to transform our application into a progressive web application and suit it up with features such as offline availability and installability.
Access the repository
You can access the code discussed in this repository on GitHub.
If you are new to, or simply interested in Progressive Web Applications I am glad to let you know that I have self published a book discussing them and you can purchase it online.
Enabling PWA support
One of the core premises of PWAs is that they work without a network connection. This functionality is enabled by browser technologies such as the service worker API and the cache interface.
We could follow a few approaches, but Angular already has PWA capabilities which we can enable by adding the appropriate plugin.
Angular and PWA
Since we are using the Angular CLI, it is straightforward to add a PWA plugin by executing ng add @angular/pwa. Let's quickly review what this plugin is doing.
The
ng addcommand adds an npm package to an Angular project, and it also configures the project by making some necessary changes - for example, changing the schematic.
Adding @angular/pwa to our application means that the @angular/service-worker package also gets added automatically to the project. Furthermore, the following gets added to app.module.ts:
import { ServiceWorkerModule } from '@angular/service-worker';
// removed for brevity
@NgModule({
  imports: [
    ServiceWorkerModule.register('ngsw-worker.js', { enabled: environment.production })
  ],
})
We can also notice changes in index.html since it will now have two extra lines added:
<link rel="manifest" href="manifest.json" />
<meta name="theme-color" content="#1976d2" />
The first line is the manifest file. We can think of this as a file that contains metadata about the PWA itself - such as the name of the app, its start_url. All of these pieces of information are used when the app gets installed on a mobile device.
The theme-color value gives the application(s) running on a mobile device a colour which makes it very easy to distinguish. Adding such a colour is also good practice from a UX perspective.
 Image taken from Google Developers
We can also see that a folder src/assets/icons got created which contains a few icons for our app. We can replace these with our own, of course.
Last but not least, a service worker configuration file also got created, which is ngsw-config.json. This is the file that we can use to customise the service worker. The service worker file will be built by Angular when creating a production build, and it'll be placed under the dist folder.
ngsw-config.json
Let's explore ngsw-config.json a little bit more in detail. There is two type of things that we can configure here - assetGroups and dataGroups. The first one (as its name suggests) allows us to define how the service worker is managing assets. Assets such as icons, images, any other static assets that the application is using. (These assets can be either local or loaded from a remote location). These assets are also versioned by
The dataGroups is different from the assetGroups since it's a place where we'd store responses from API requests and because of their dynamic nature, these requests are not versioned along with the application. Caching happens according to a policy that can be configured manually.
In light of the above information it's clear that we won't be using the dataGroups section but only the assetGroups section because we have some static assets - like fonts - that we need to cache to make it available when the application works offline.
Let's also spend some time discussing the installMode and updateMode options, which can have the value lazy and prefetch.
installMode drives how the resources listed in a given resource group are cached. Similarly, the updateMode determines how resources are updated that are already present in the cache. Both of these modes can take lazy and prefetch values.
prefetch fetches all the resources while it's caching the application. lazy is different because it's only caching resources when that resource is requested. (We can think if prefetch as an eager caching, while lazy caching is on-demand.) For updateMode these values work in precisely the same way.
To learn more about
ngsw-config.jsonconsult the Angular documentation.
This is how our final ngsw-config.json file looks like. We are caching all the static resources, as well as all the assets that make up our application - notice how we add the three URLs with a pattern match as well making sure that all the fonts and the images from Cloudinary are also added to the cache.
{
"index": "/index.html",
"assetGroups": [
{
"name": "app",
"installMode": "prefetch",
"resources": {
"files": ["/favicon.ico", "/index.html", "/*.css", "/*.js"]
}
},
{
"name": "assets",
"installMode": "lazy",
"updateMode": "prefetch",
"resources": {
"files": ["/assets/**"],
"urls": [
"https://fonts.googleapis.com/**",
"https://fonts.gstatic.com/**",
"https://res.cloudinary.com/**"
]
}
}
]
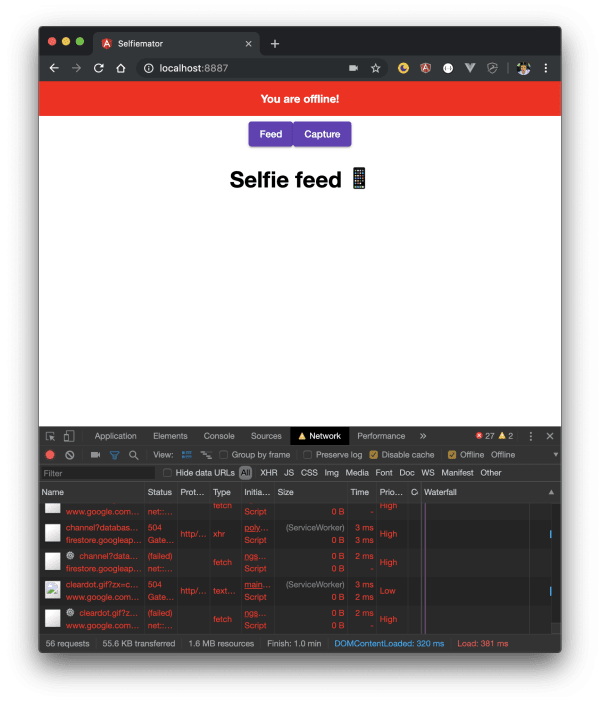
}We are offline - what to do?
Now that we have the service worker functionality out of the way, we can add a few things to the application itself. It would be great if we could show some visual indicators to our users when the application is offline, and of course, we should have some different functionality in place for the photo upload.
Our approach is going to be the following: we'll allow users to take a picture, but if they are offline, we'll show a button saying 'use and upload later' and store the base 64 encoded image locally, in the browser via localStorage. If the app goes back online, we'll go through localStorage and upload any photos stored in there (and delete them). Using this approach will enable full offline functionality.
The best way to manage the online/offline state of the application is to create a service that we'll use in all the components as and when needed. Let's create a service: ng c s connection, and add the following to it:
import { Injectable } from '@angular/core';
import { Observable, fromEvent, merge, of, BehaviorSubject } from 'rxjs';
import { mapTo } from 'rxjs/operators';

@Injectable({
  providedIn: 'root',
})
export class ConnectionService {
  private behaviorSubject$;
  behaviorSubjectObservable$: Observable<boolean>;

  constructor() {}

  start() {
    this.initSubjects();
    this.behaviorSubject$.next();
  }

  initSubjects() {
    this.behaviorSubject$ = new BehaviorSubject(true);
    this.behaviorSubjectObservable$ = merge(
      of(navigator.onLine),
      fromEvent(window, 'online').pipe(mapTo(true)),
      fromEvent(window, 'offline').pipe(mapTo(false))
    );
  }
}
The essential thing in the code above is that we create an observable from the navigator.onLine value using the window online/offline event. In other words, if navigator.onLine is true we can return an observable with a value of true, and if it's false we can return false.
To see why
BehaviourSubjectis being used here, take a look at this excellent talk by Dan Wahlin on Mastering the Subject: Communication Options in RxJS.
Initially I did struggle a lot with this section as I was using plain
Observablebut the issue was that when the components subscribed, it was too late to get the initial events, so they would just have whatever the default value was until another event was fired by the window (after the components were displayed). This meant that even though the application was offline, loading a different component would show that the application is offline. UsingBehviorSubjectsolved this problem.
Using the Service
Since we have the service ready, we can try using it. Let's first make some changes to root component (app.component.html):
<div class="offline" *ngIf="!online">You are offline!</div>And in app.component.ts:
import { ConnectionService } from './connection.service';
// ... removed code for brevity
  constructor(
    private snackBar: MatSnackBar,
    private http: HttpClient,
    private db: AngularFirestore,
    private connection: ConnectionService,
    private router: Router) { }
ngOnInit() {
  this.connection.start();
  this.captureCollectionRef = this.db.collection<any>('captures');
  this.connection.behaviorSubjectObservable$.subscribe(online => {
    this.online = online;
    if (!this.online) {
      this.snackBar.open('You are offline!', 'OK', { duration: 5000 });
    } else {
      this.snackBar.dismiss();
    }
  });
}
The above code achieves two things. It adds a banner on the top of the page indicating the lack of network connectivity as well as providing a snack bar notification to the user.
Taking pictures while offline
One of the key pieces of functionality is to allow users to take pictures while they are offline, store those images and upload them when the app is online again. This functionality is added in the "capture" component:
<mat-card-actions *ngIf="actions">
  <button
    mat-raised-button
    color="primary"
    (click)="capture()"
    *ngIf="displayStream"
  >
    Capture Photo
  </button>
  <button
    mat-raised-button
    color="warn"
    (click)="retakePhoto()"
    *ngIf="!displayStream"
  >
    Retake Photo
  </button>
  <button
    mat-raised-button
    color="accent"
    (click)="usePhoto()"
    *ngIf="online && !displayStream"
  >
    Use photo
  </button>
  <button
    mat-raised-button
    color="accent"
    (click)="usePhoto()"
    *ngIf="!online && !displayStream"
  >
    Use photo and upload later
  </button>
</mat-card-actions>
To achieve this functionality, we can leverage the connection service that we have created. This is how the usePhoto() method looks like after some modifications:
public usePhoto() {
  const capture = this.canvas.nativeElement.toDataURL('image/jpeg');
  const timeTaken = new Date().getTime();
  if (!navigator.onLine) {
    localStorage.setItem(`capture@${timeTaken}`, capture);
    this.snackBar.open(`Since you're offline, your photo will be uploaded the next time you go online.`, 'Got it!');
  } else {
    this.http.post(`https://api.cloudinary.com/v1_1/${environment.cloudName}/image/upload`, {
      file: capture,
      upload_preset: environment.uploadPreset
    }).subscribe((response: any) => {
      if (response) {
        this.captureCollectionRef.add({
          public_id: response.public_id,
          uploaded: timeTaken
        }).then(() => {
          this.router.navigateByUrl('/');
        });
      }
    });
  }
}
Notice that if we are offline, we add the picture to the localStorage keyed off by capture@ followed by the upload time. This allows us to do something amazing. When we are online, we can iterate through the items in localStorage and upload them.
This functionality is added to the app.component.ts since it should be available application-wide. So this is how the final code looks like:
ngOnInit() {
  this.connection.start();
  this.captureCollectionRef = this.db.collection<any>('captures');
  this.connection.behaviorSubjectObservable$.subscribe(online => {
    this.online = online;
    if (!this.online) {
      this.snackBar.open('You are offline!', 'OK', { duration: 5000 });
    } else {
      this.snackBar.dismiss();
      // upload from LocalStorage
      const items = { ...localStorage };
      const keys = Object.keys(items);
      const uploadKeys = keys.filter(key => key.includes('capture@'));
      uploadKeys.forEach(uploadKey => {
        this.snackBar.open(`Uploading photo taken at ${formatDate(uploadKey.split('@')[1], 'yyyy-MM-dd hh:mm:ss', 'en-GB')}`, 'OK', { duration: 5000 });
        const photoToUpload = localStorage.getItem(uploadKey);
        return this.http.post(`https://api.cloudinary.com/v1_1/${environment.cloudName}/image/upload`, {
          file: photoToUpload,
          upload_preset: environment.uploadPreset
        }).subscribe((response: any) => {
          if (response) {
            localStorage.removeItem(uploadKey);
            return this.captureCollectionRef.add({
              public_id: response.public_id,
              uploaded: new Date().getTime()
            }).then(() => {
              this.router.navigateByUrl('/');
            });
          }
        });
      });
    }
  });
}
We iterate through the items in localStorage, find the ones where the key includes capture@ and upload those images to Cloudinary, add an entry to Firebase and last but not least, we delete the entry from localStorage.
Realtime but offline?
At this point, we have all the functionality in place; however, there's one more thing that's left that we need to discuss.
Firebase provides us with a realtime feed of photos that are uploaded by users, but if we bring the application offline, nothing is being displayed, and the browser console is full of errors. This is expected - the app is offline, and yet we try to reach the Firebase database to always "watch" for incoming images.
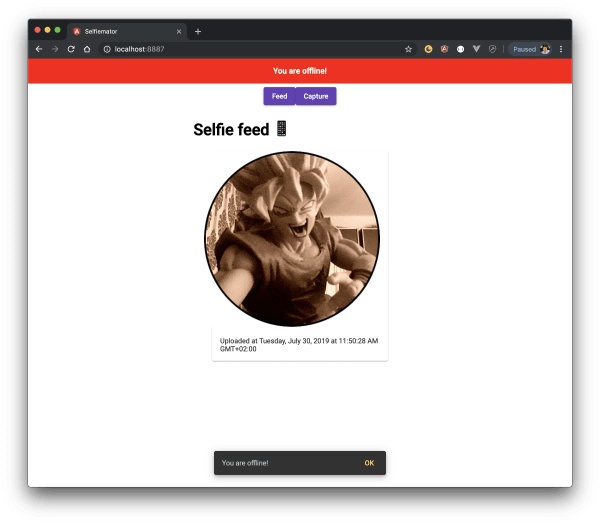
The solution? Persistence mode. Firebase allows us to access data even though we are offline - they refer to this feature as offline data persistence. To enable this mode, we need to make one small change in app.module.ts and call the enablePersistence() method:
@NgModule({
// ... removed code for brevity
  imports: [
    AngularFirestoreModule.enablePersistence(),
  ]
})
And that's it. Now the images will load even though we are offline.
Conclusion
Hopefully by reading through the tutorial you have managed to get a better understanding on how to create Progressive Web Applications using Angular and Firebase. The combination of these tools, expanded with additional support from other APIs (Cloudinary in our case) allow us to create truly amazing PWAs.